How to Drape a Saree in 10 Minutes: The Foolproof Nivi Guide for Every Body Type
The Nivi drape takes most beginners 45 minutes of sweating and repinning. With the right sequence, you can do it in 10 — and have it stay put through a full wedding reception. Here's exactly how, with specific fixes for every body type.
What Is the Nivi Drape — and Why Does It Dominate?
The Nivi style originated in Andhra Pradesh roughly 200 years ago and has since become the default saree drape across India. When Bollywood heroines "wear a saree" on screen, it's almost always a Nivi. When a politician or CEO drapes for an official event, it's Nivi. It's the universal grammar of saree-wearing.
What made it dominant isn't just aesthetics — it's the geometry. The Nivi creates a clean fall at the front, a structured pallu over the left shoulder, and a drape that works with gravity rather than against it. A well-pinned Nivi is genuinely stable for 6–8 hours.

What You Need Before You Start
Get these ready before you touch the saree:
- A fitted petticoat in a matching or neutral colour. This is the single most important factor in how your Nivi holds. A loose petticoat = saree that falls. Period.
- 5–7 safety pins (the gold-toned ones blend with silk better than silver)
- Blouse pinned or hooked closed — draping over an open blouse is a recipe for disaster
- Flat or low-heeled footwear for practice — you'll adjust length for heels once you know your drape
Fabric note: If you're learning on a silk saree, choose a medium-weight one. A Kanjivaram or a woven silk blend drapes beautifully and holds pleats far better than chiffon, which slides and requires more pinning. Light chiffons are harder to learn on — save those for after you've got the basics down.

Step-by-Step: The Nivi Drape in 10 Minutes
Follow this sequence exactly. The order matters.
- Tuck the plain end (Step 1 — 1 minute): Hold the non-decorated end of the saree. Tuck it into the right side of your petticoat at the navel, keeping the bottom hem just touching or 1 cm above the floor. Wrap once around your body to the right, making one full circle back to your front.
- Make the pleats (Step 2 — 3 minutes): Create 5–7 pleats of equal width — around 5 inches each. Fan them out in your left hand before tucking. They should all face left. Even pleats are the whole game — uneven ones bunch and pull asymmetrically.
- Tuck and pin the pleats (Step 3 — 1 minute): Tuck the pleat bundle into the centre-front of your petticoat, angled slightly left. Pin through the top fold into the petticoat waistband. This one pin is your anchor.
- Drape the pallu (Step 4 — 3 minutes): Take the remaining fabric (the decorated pallu end) from your back, bring it across your body from right to left, and throw it over your left shoulder. The pallu should hang behind you at roughly knee length. Adjust the length now, not later.
- Pin the pallu (Step 5 — 2 minutes): Pin the pallu to your blouse at the left shoulder — ideally two pins, one at the shoulder seam and one 3–4 inches below it on the pallu fold. This prevents the classic "pallu keeps sliding off" problem that plagues most beginners.
That's it. Total: 10 minutes with practice. The first time will take 20–25 minutes, and that's normal.

Body Type Fixes: What Actually Works
Generic draping guides ignore this. Here's what actually adjusts the silhouette:
Petite / shorter frames: Keep pleats narrow (3–4 inches), tuck them slightly higher on the waist, and let the pallu fall longer. Narrow vertical pleats elongate. Avoid volume at the hip.
Curvy / fuller waist: Make 7–8 pleats instead of 5–6 — more, thinner pleats create a smoother line across the front. A thicker pleat bundle at the centre adds bulk. Drape the pallu diagonally across the body rather than straight over the shoulder; the diagonal line is slimming.
Tall frames: Go wider with pleats (5–6 inches) and add a half-pleat at the end to use up more fabric. Let the pallu drop lower — mid-calf looks proportional on a taller body.
Broad shoulders: Keep the pallu flat against the shoulder rather than bunched. A pleated pallu draped forward over the shoulder (instead of the standard back-hanging style) softens the shoulder line.
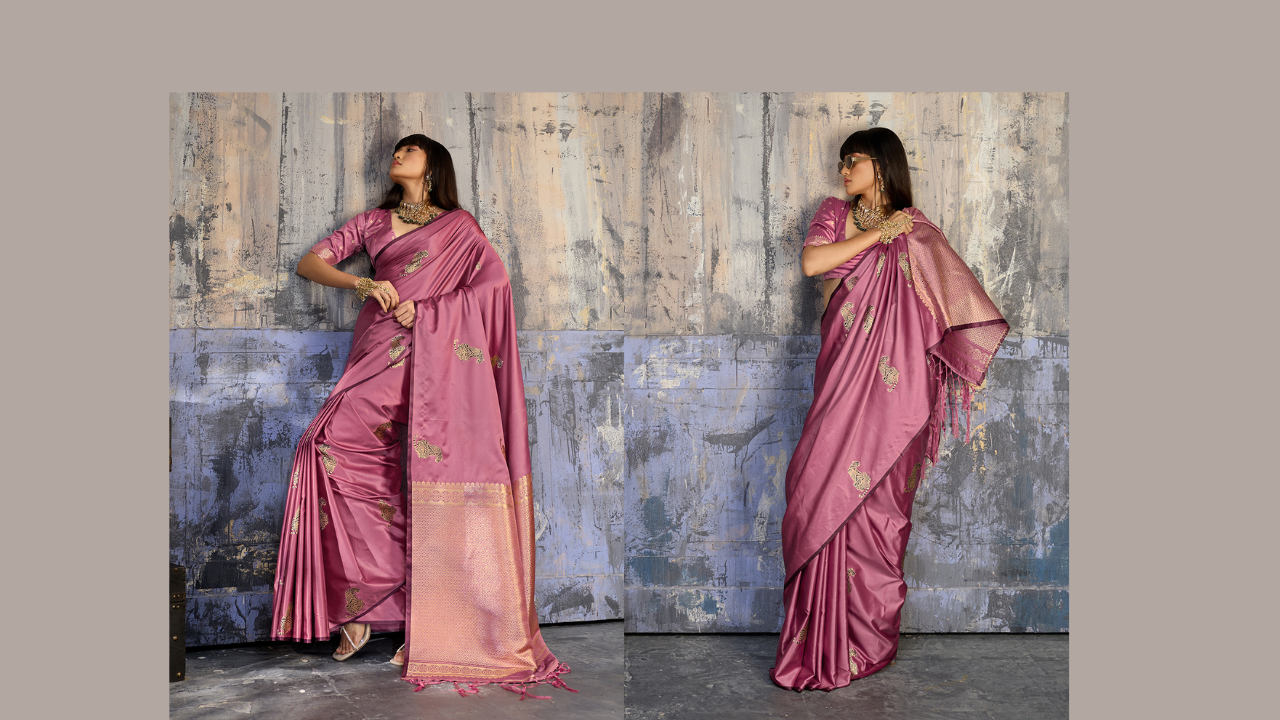
A well-draped Kanjivaram silk like this puce purple one is ideal for learning the Nivi — the medium-weight silk blend holds pleats cleanly and doesn't slip. It's forgiving for beginners in a way that georgette simply isn't.

The 3 Most Common Nivi Mistakes (and How to Fix Them)
Mistake 1: Uneven pleats. The fix is to fan out all your pleats in your hand and align the top edges before tucking — treat it like folding paper, not fabric. Rushing the pleat step ruins the whole drape.
Mistake 2: Pallu that keeps slipping. One pin at the shoulder is not enough. Two pins — one at the blouse shoulder seam and one lower on the pallu — create a triangle of tension that holds all day. Also check: is your pallu hemmed edge or border side facing outward? The border should show.
Mistake 3: Saree too long or too short at hem. The hem should graze the floor when you're in heels, or sit 1–2 cm above the floor in flats. Fix this during the very first wrap, not after you've finished the pallu. Once the pallu is draped, adjusting the hem means starting over.
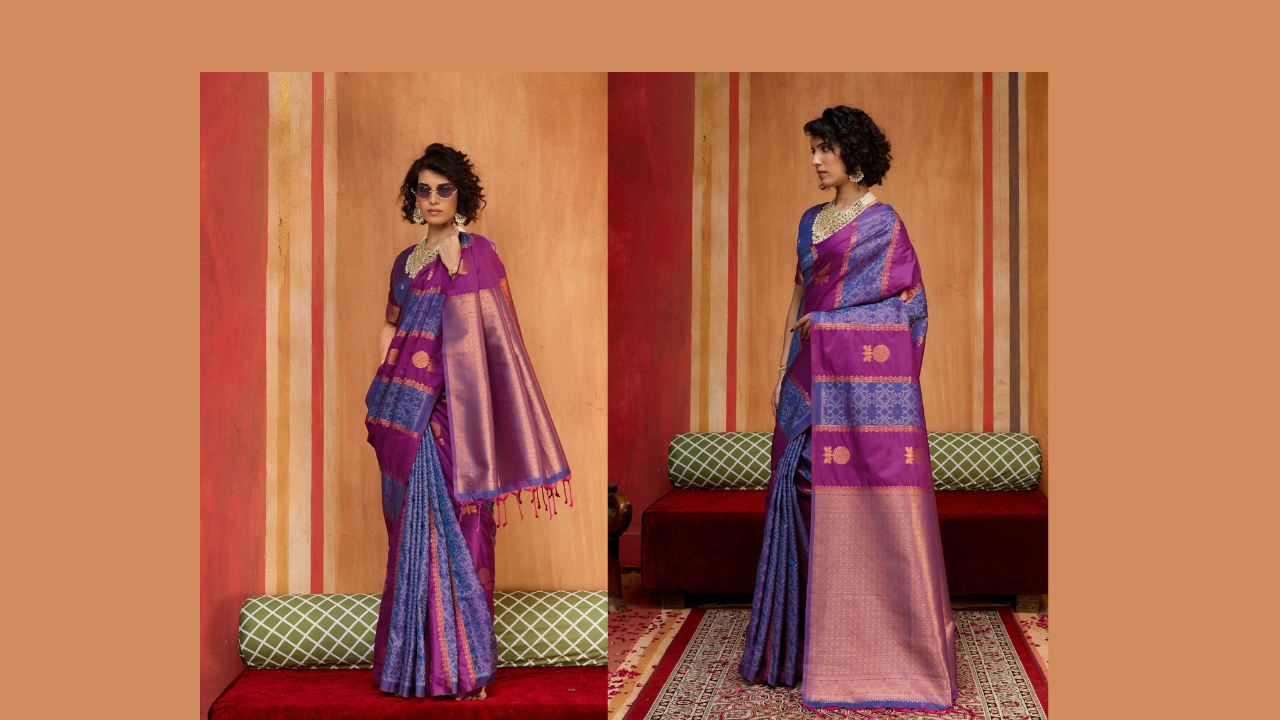
For occasions that call for more formality — a wedding, a puja, or Rath Yatra celebrations — a heavier woven silk like the Kashmiri Jamawar Banarasi in rhino blue drapes with beautiful weight and structure. The heavier the silk, the less you need to fight with the fabric.

Frequently Asked Questions
How many safety pins do I need for a Nivi drape?
Minimum five: one at the initial tuck (right side), one through the pleat bundle into the petticoat, one at the back near the hip to stop the saree shifting, and two on the pallu at the shoulder. Six to seven is better for a full day of wear at an event.
Which fabric is easiest to drape in Nivi style?
Medium-weight woven silk or cotton silk blends are the easiest — they hold pleats, don't slip, and forgive small imperfections. Chiffon and georgette are beautiful but require more pins and more precision. Pure crepe silk falls well but needs starch-free petticoats to prevent static cling.
Can I drape a Nivi saree alone without help?
Absolutely — and most Indian women do. The trick is draping in front of a full-length mirror, and using a clip or binder clip to temporarily hold the pleat bundle against your waist while you pin it. Once you've done it 5–6 times, it becomes muscle memory.
For a deeper look at fabric choices and how they affect drapeability, read our complete silk saree buying guide — it covers everything from weave types to zari quality, with specific care instructions post-draping.
Shop sarees that drape beautifully at MySilkLove →
Shop Sarees That Are Easy to Drape
The Nivi is easiest to learn on medium-weight woven silk that holds its pleats. Pick your practice piece from these MySilkLove edits and sort by price:
- Medium-weight, pleat-holding silks ideal for beginners: browse our pure silk sarees.
- The forgiving, structured weave this guide recommends to learn on: shop our Kanjivaram silk sarees.
- Reception and event-ready drapes that photograph beautifully: explore our party wear sarees.

Leave a comment
This site is protected by hCaptcha and the hCaptcha Privacy Policy and Terms of Service apply.